Trouble Opening the File
- What kind of device are you using? I recommend using a computer as the files are big and phones and tablets do not always have the software or space to open files this large.
- What type of file is it? If it is a PDF you will need a reader such as Adobe to open and view it. If it is a ZIP file, you will need to extract/unzip the files to get them all open. If you aren't opening the files correctly or have the right program to open files, this will cause problems.
- Where are you opening the file from? Are you on a work computer? Did you use a work email? I find that many times when people email me and say a link doesn't work or a file won't open, that I click it and open it without a problem. What often happens is their school or district has blocks set up and isn't allowing them to open external files. Use your personal email and computer whenever possible.
Black Background Behind Pictures
Black blackground around clip art is not normal. I repeat this is not normal. The amount of buyers I see that have printed out resources with black backgrounds that use it and don’t realize that isn’t right blows my mind. As a content creator it drives me nuts because that is not what it was supposed to look like in my head when I designed the activity.
This seems to happen especially with Macs, but can happen to anyone. It seems like this happens most frequently when you download a file and it automatically opens on the screen with your browsers’ preview mode and then you print from there.
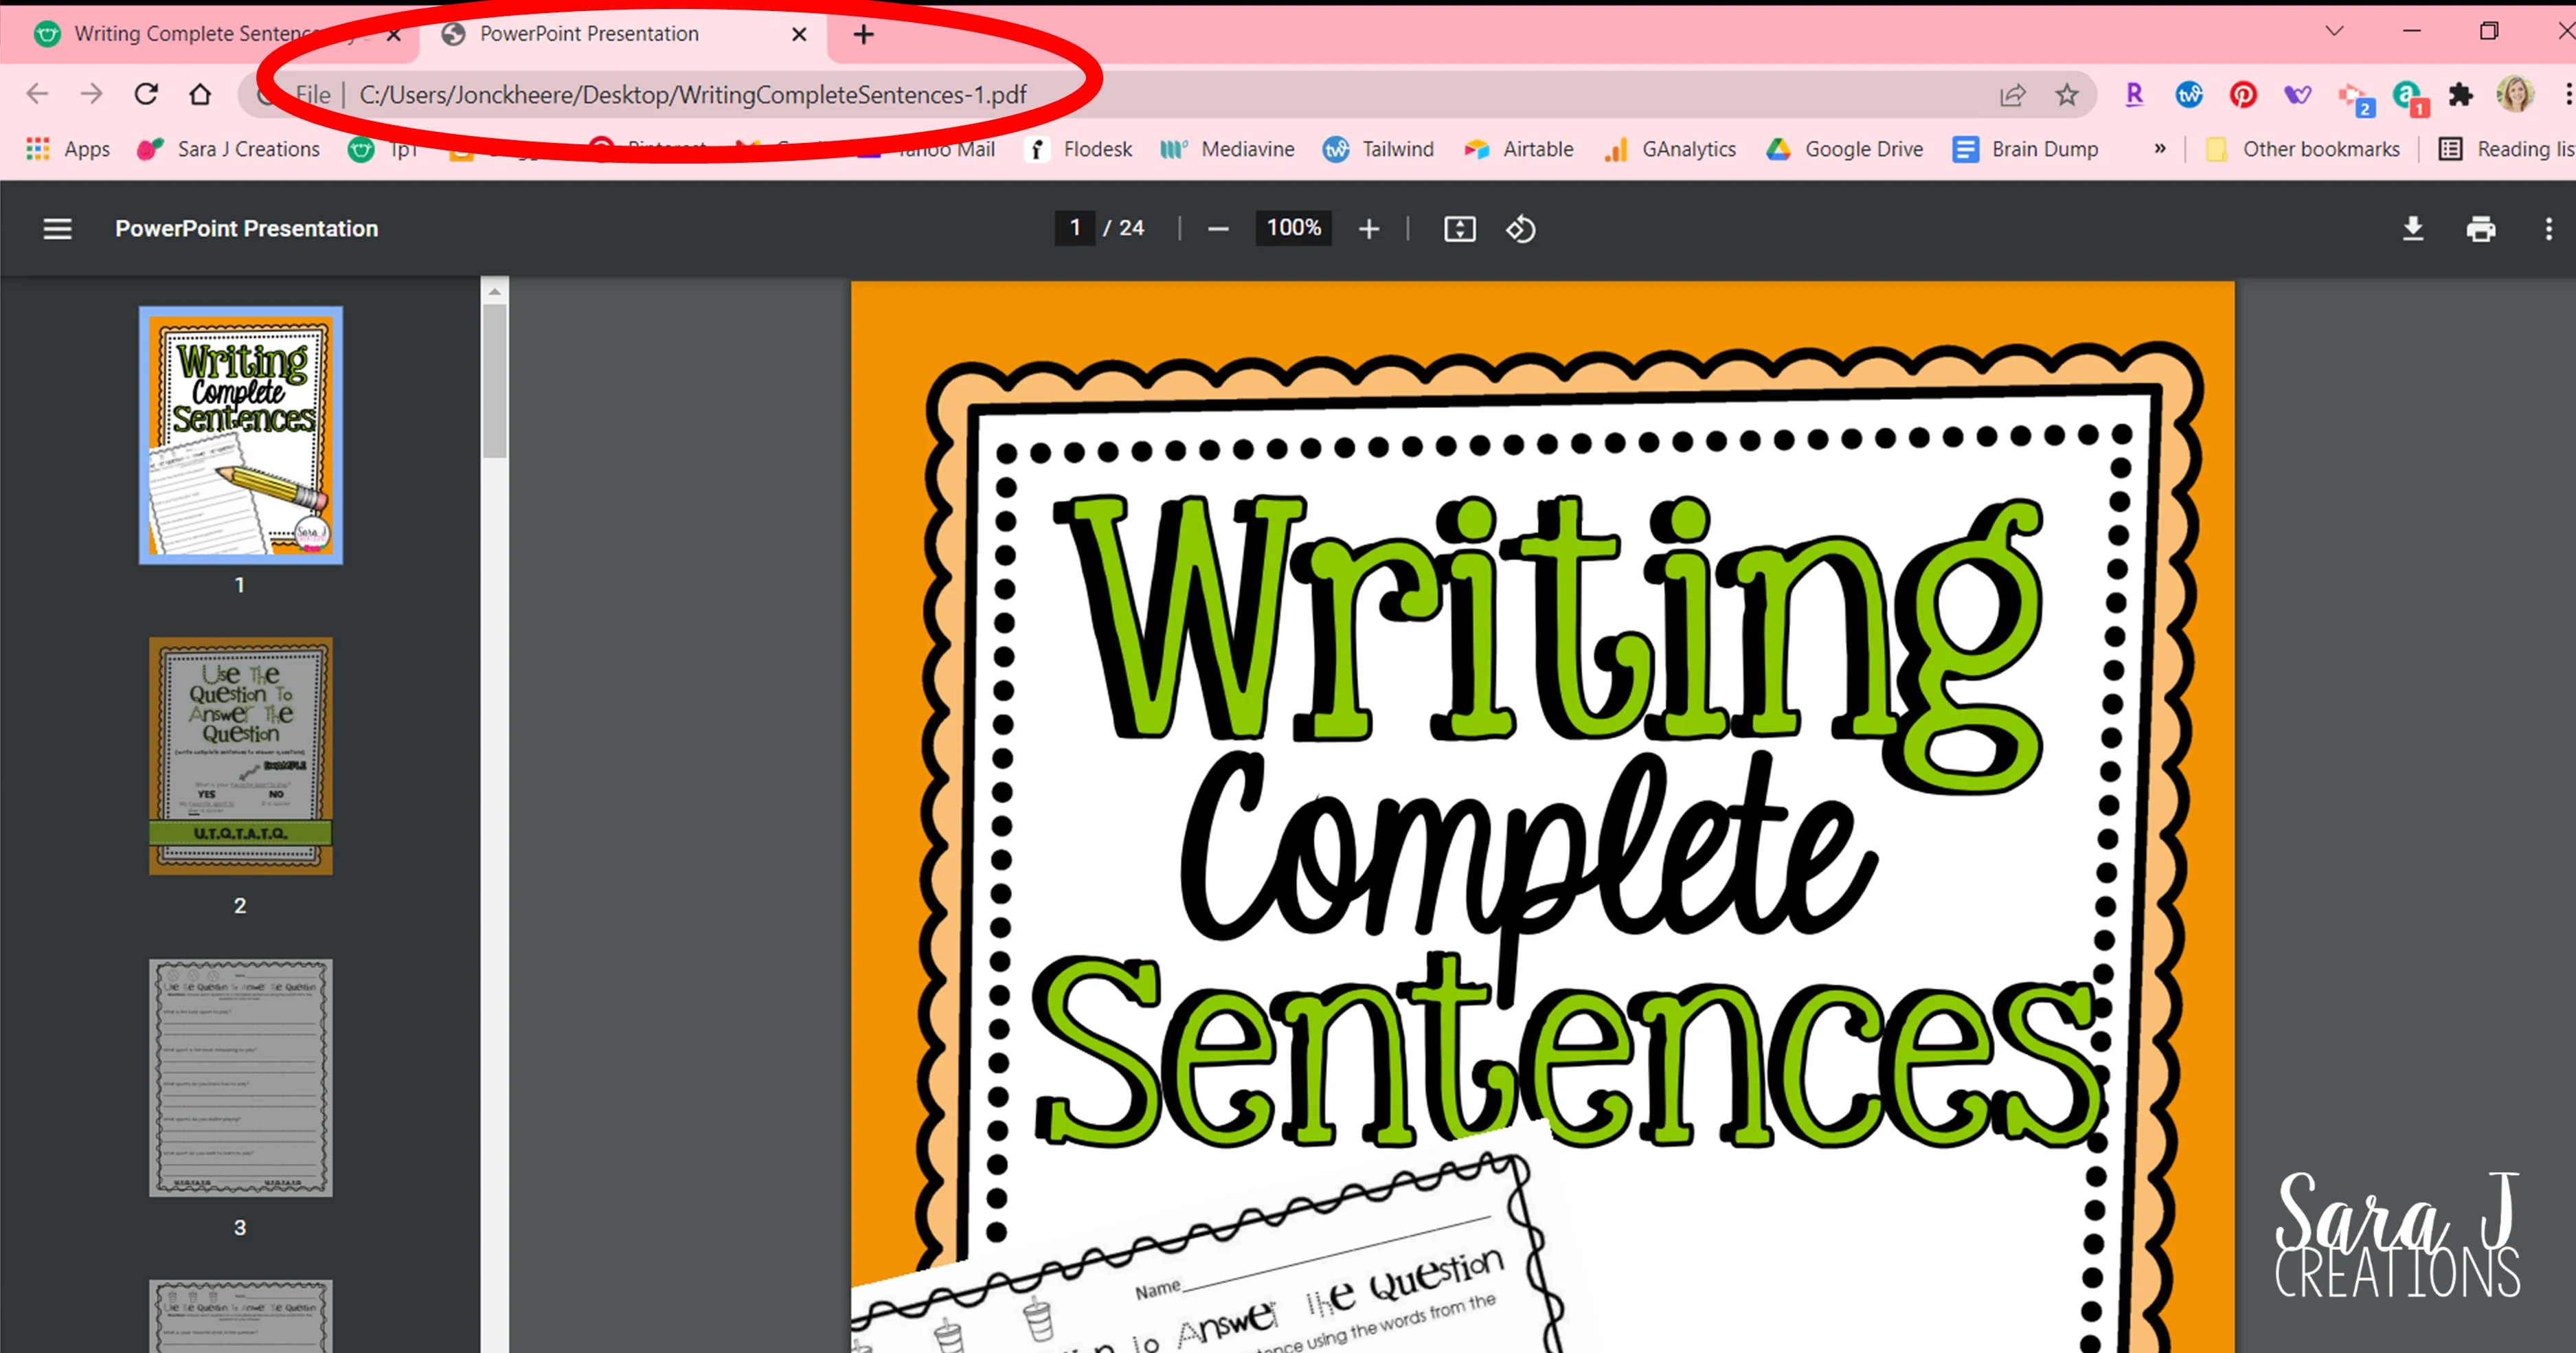
Does the file open up as a tab in your internet browser? That could be a clue that it isn’t opening correctly. There isn’t a problem viewing the file that way, but when you print it can cause issues like the black background. It also causes issues with editable files and it won’t always let you type in the words you want. This is often set as the default on your computer.
I often recommend these steps, not only for the black background and editing issues, but any pdf issue.
- Save the file to your computer.
- Open the file with Adobe. (Download FREE Version HERE)
- Then you can print from there.
Also, make sure you have the most updated version of Adobe (just the free version is fine.) Outdated version can also cause weird little glitches in a pdf document. You can use other pdf readers, but Adobe is pretty standard on most computers and what most teacher authors work with regularly.
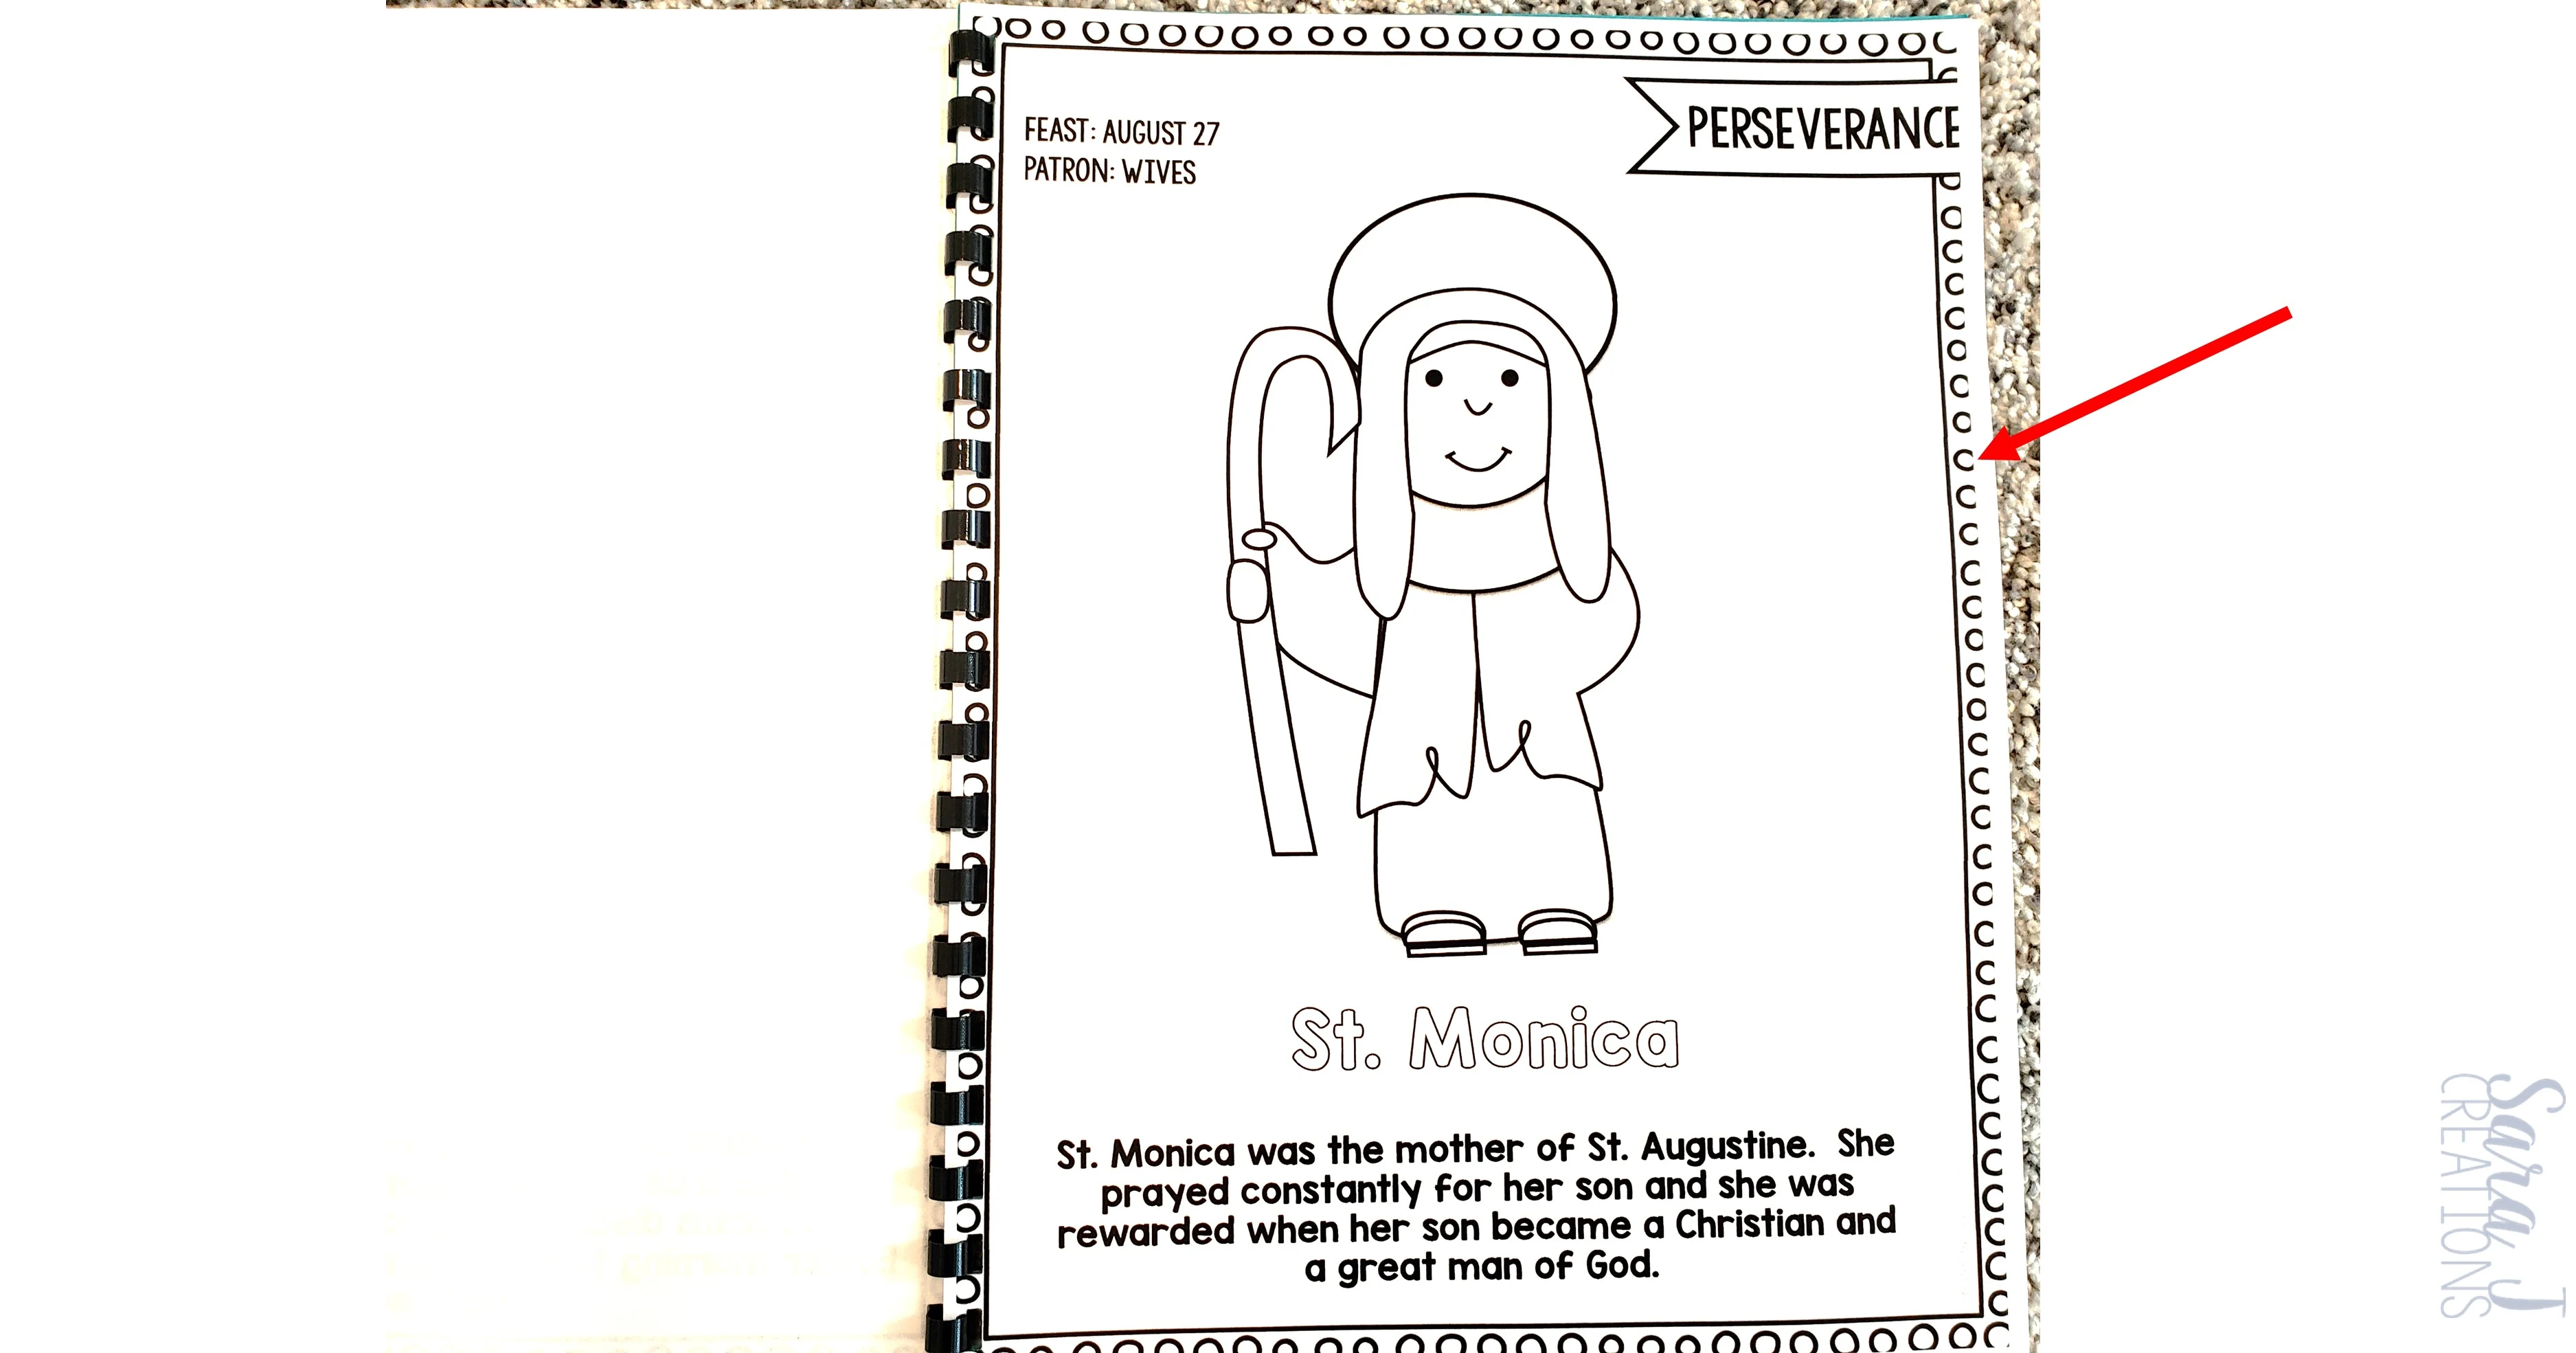
Border cutting off
Every printer has different settings but if you have a resource that is cutting off the border or parts of the resource, you can change this on your end.
Open the file and go to print and then look for an option that says shrink oversized pages, shrink to page, or fit to page. Again, each printer is different so your settings might say something different but look for a similar option where it will automatically reduce the size of the page to fit the paper better.
Print smaller or larger
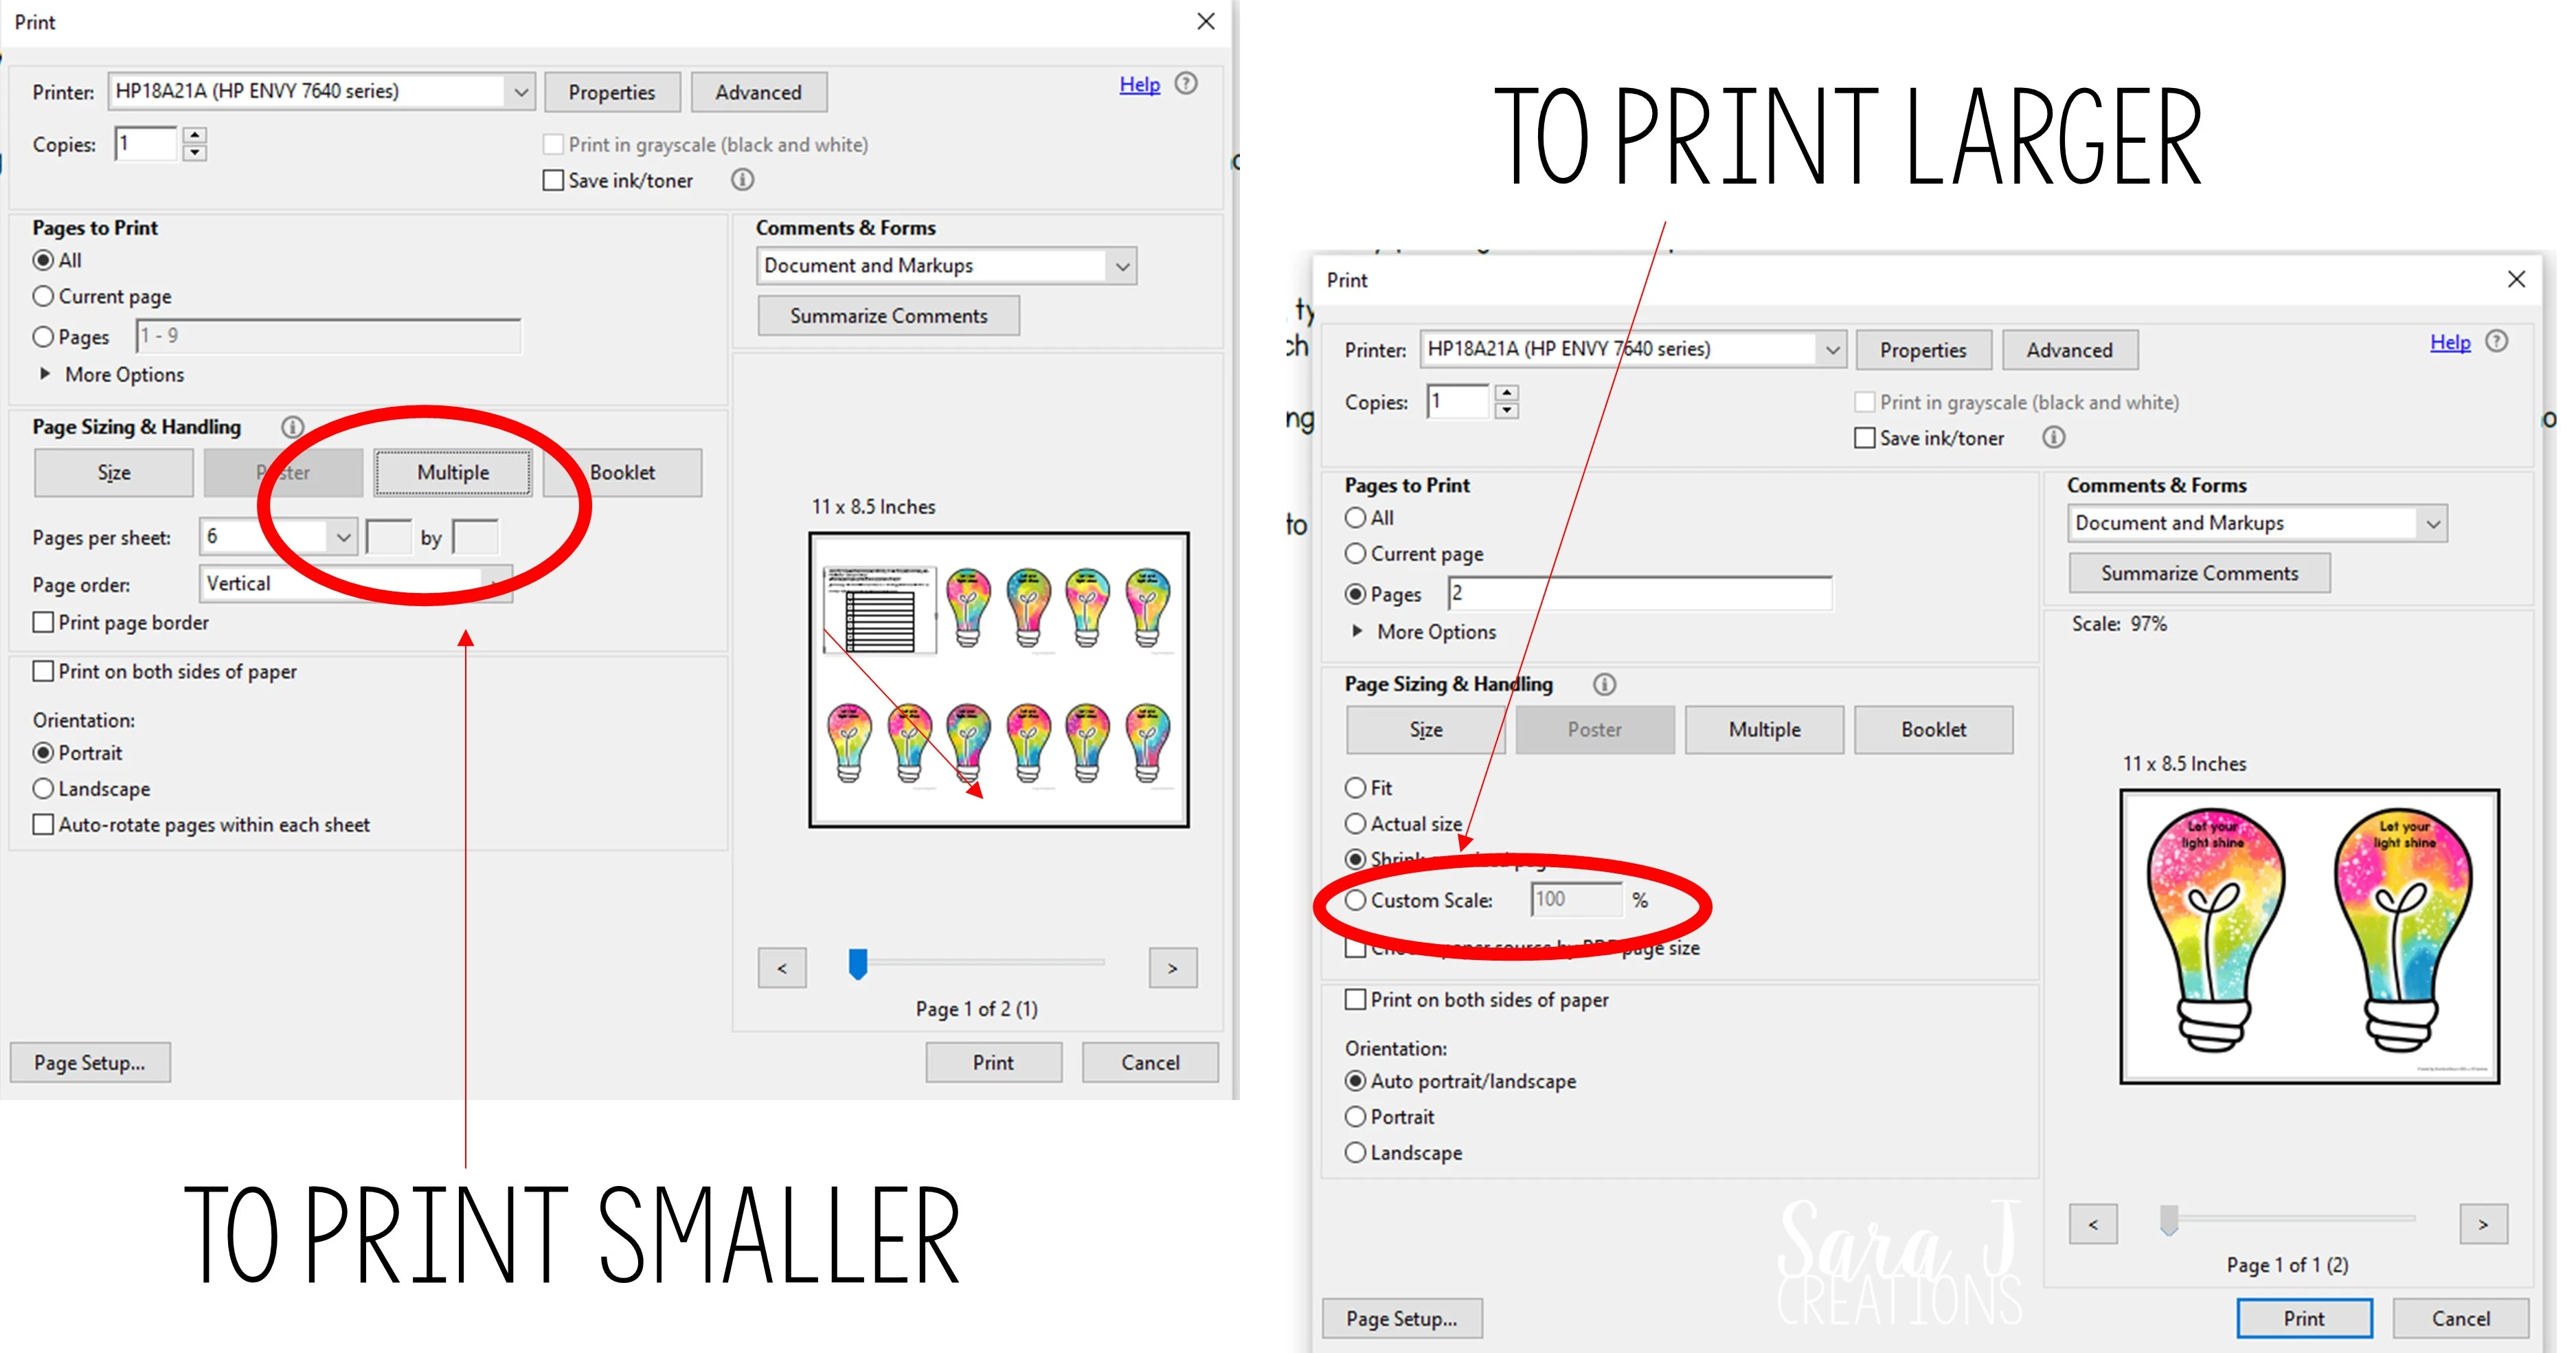
Have you ever needed a resource bigger or smaller than the standard page size it printed on? Have you spent time on the copy machine messing with the percentage to get something to zoom in? You can do that same thing in the print settings and adjust percentages. There are also a few easy options if you are opening the pdf with Adobe.
If you want to make things smaller and print more than one to a page, go to file and print. Then go down to where it says multiple. From here you can adjust how many per page and it will shrink down the full size pages and put that many on a standard size paper. This is a great paper saving option.
It is also helpful and something I recommend for my bulletin board sets. Since bulletin boards come in all different sizes, you sometimes want to print letters smaller to fit your board. Just pick multiple and how many per page. You might also need to adjust if your page is set to landscape or vertical to better fit those onto one page. An easy quick way to get mini versions without messing with percentages.
Trouble Editing an Editable File (color by sight word pages)
Many resources you purchase on TpT are labelled as editable. I have several editable products in my store designed to let teachers use the resource with any sight word list they want. While we as teacher authors say “editable” that isn’t truly the case. Let me explain a little bit.
Generally what you are buying is a “fillable” resource, meaning you can type what you want into designated areas or text boxes. You usually can’t delete what is already there, change clip art, move things around, etc. To make something completely editable like that, teacher authors would not only violate terms of use for clip art and fonts, but they would also lose the integrity of their work. And let’s be honest, if you are going to change that many things, you could just create the resource yourself to meet your needs.
But what you can do with these types of resources is use the text boxes set up for you to type in the word or words you want. The upside of these types of resources is that you can make it fit your needs a little better.
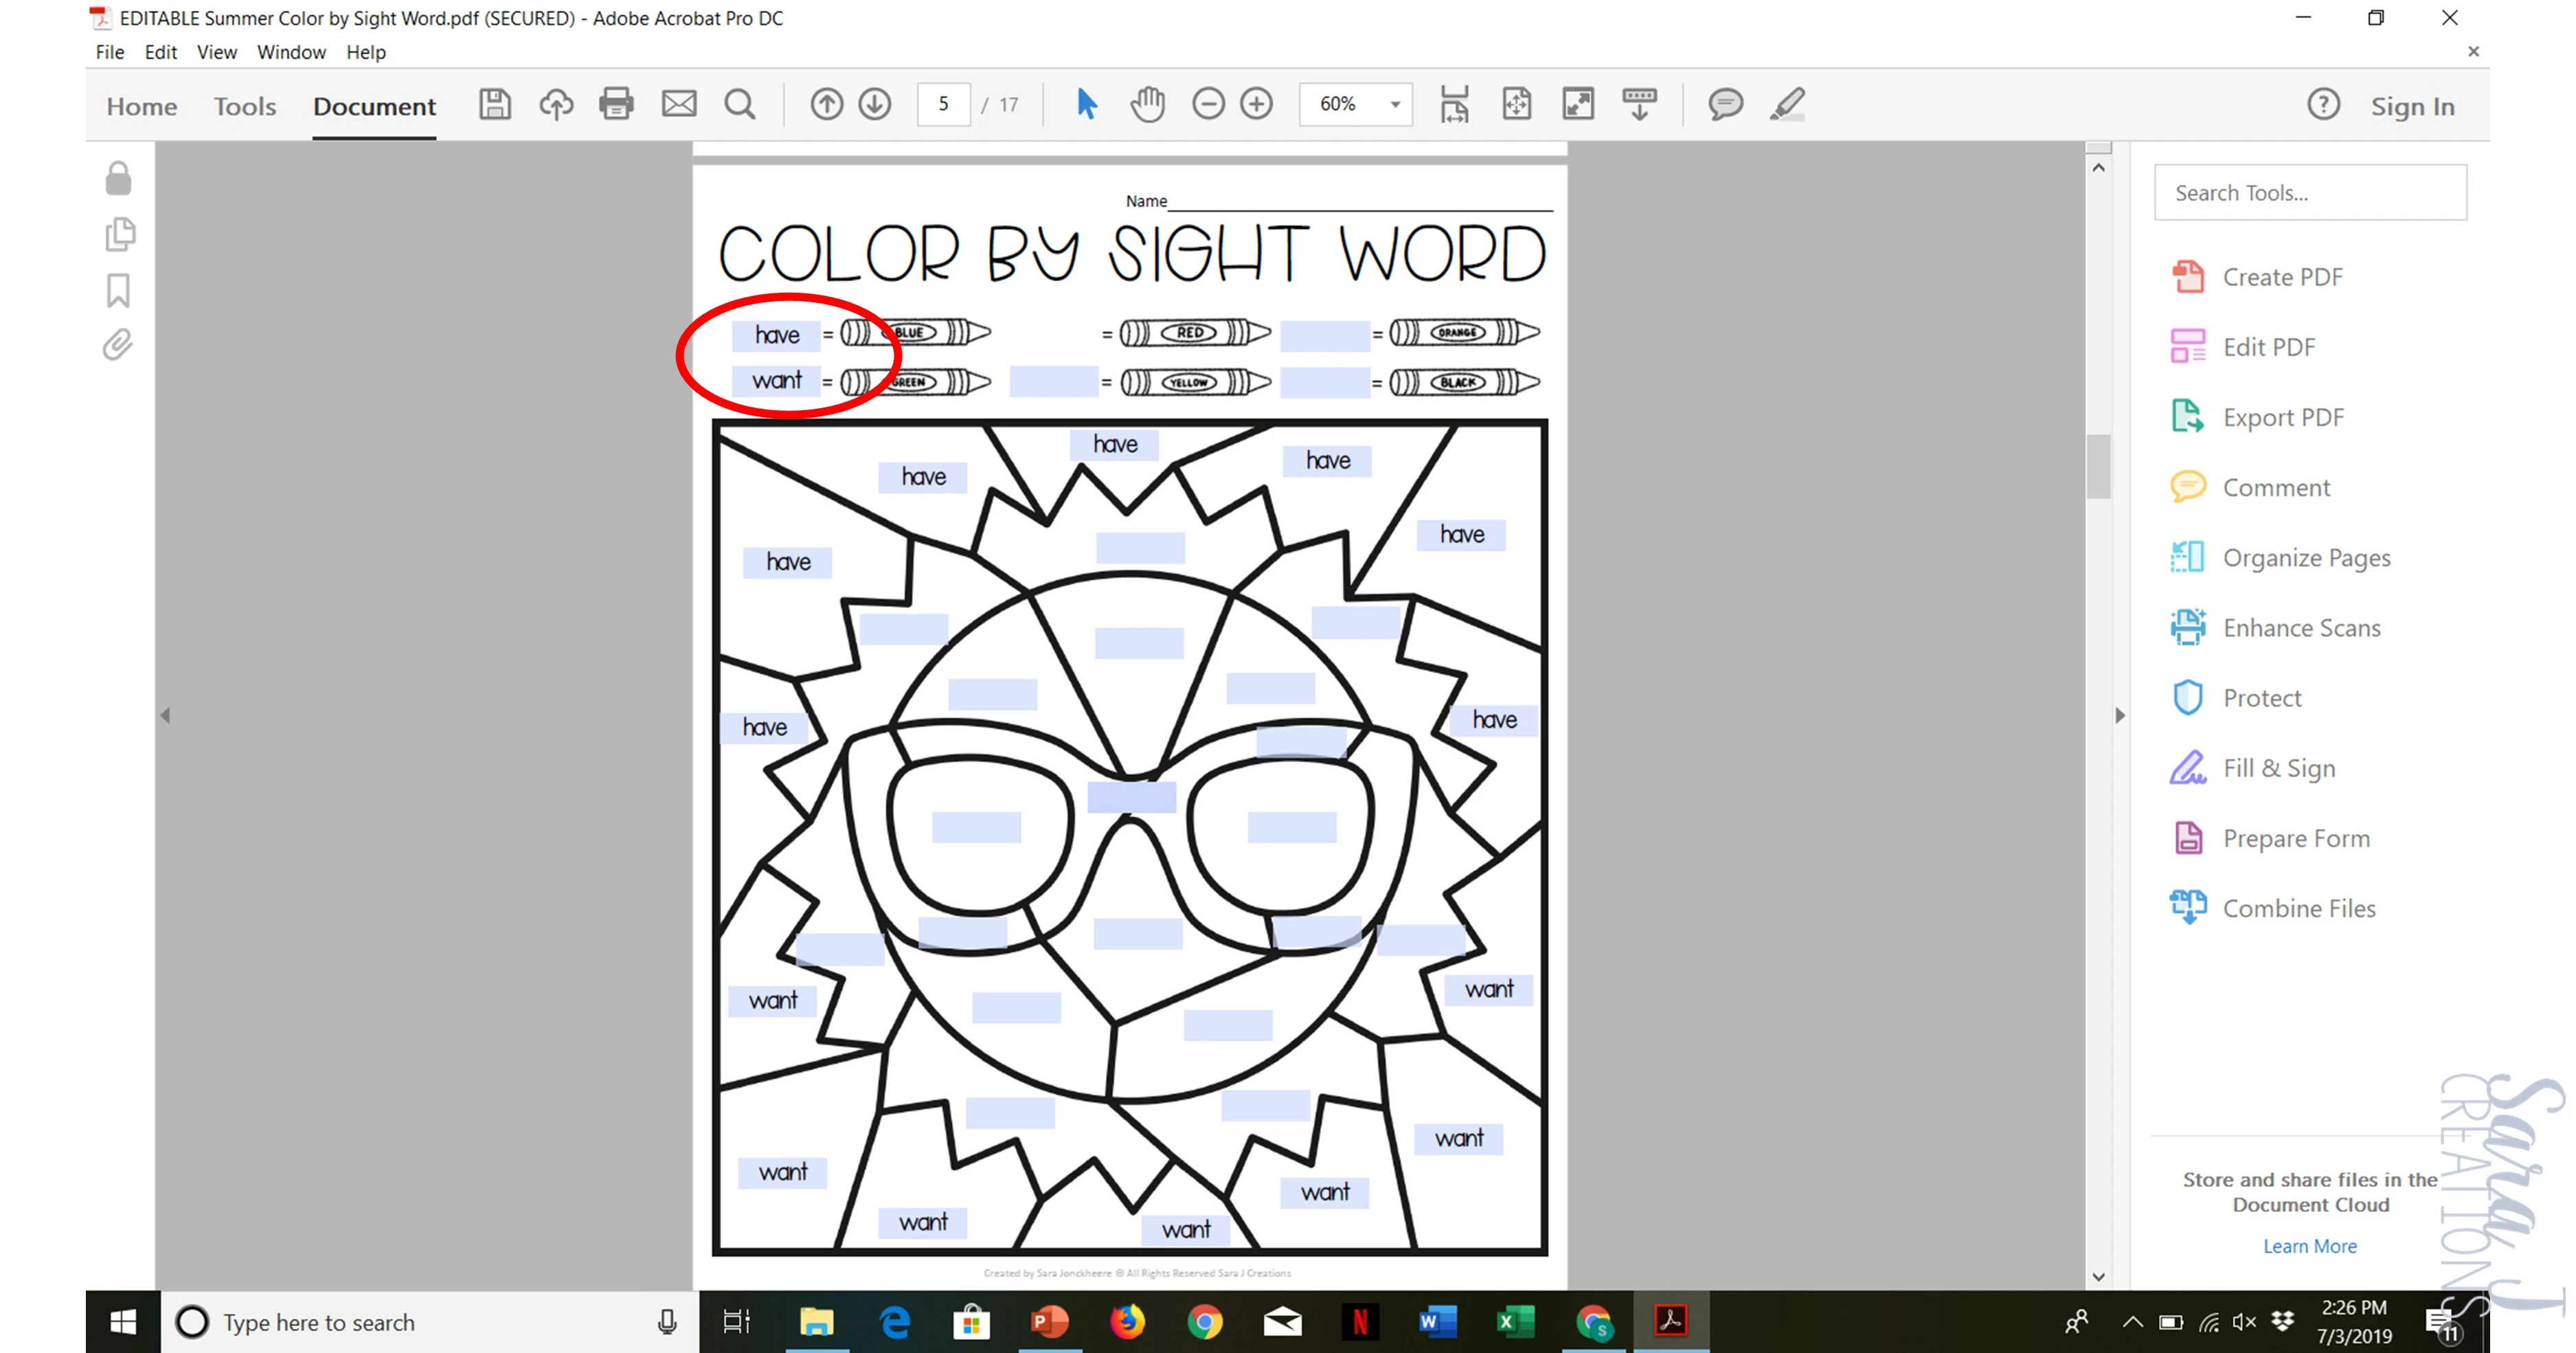
For example, in my Color by Sight Word Pictures, you can add the words your students are working on and they will fill into the pictures instead of just a random list of sight words, some of which your students might not even know yet.
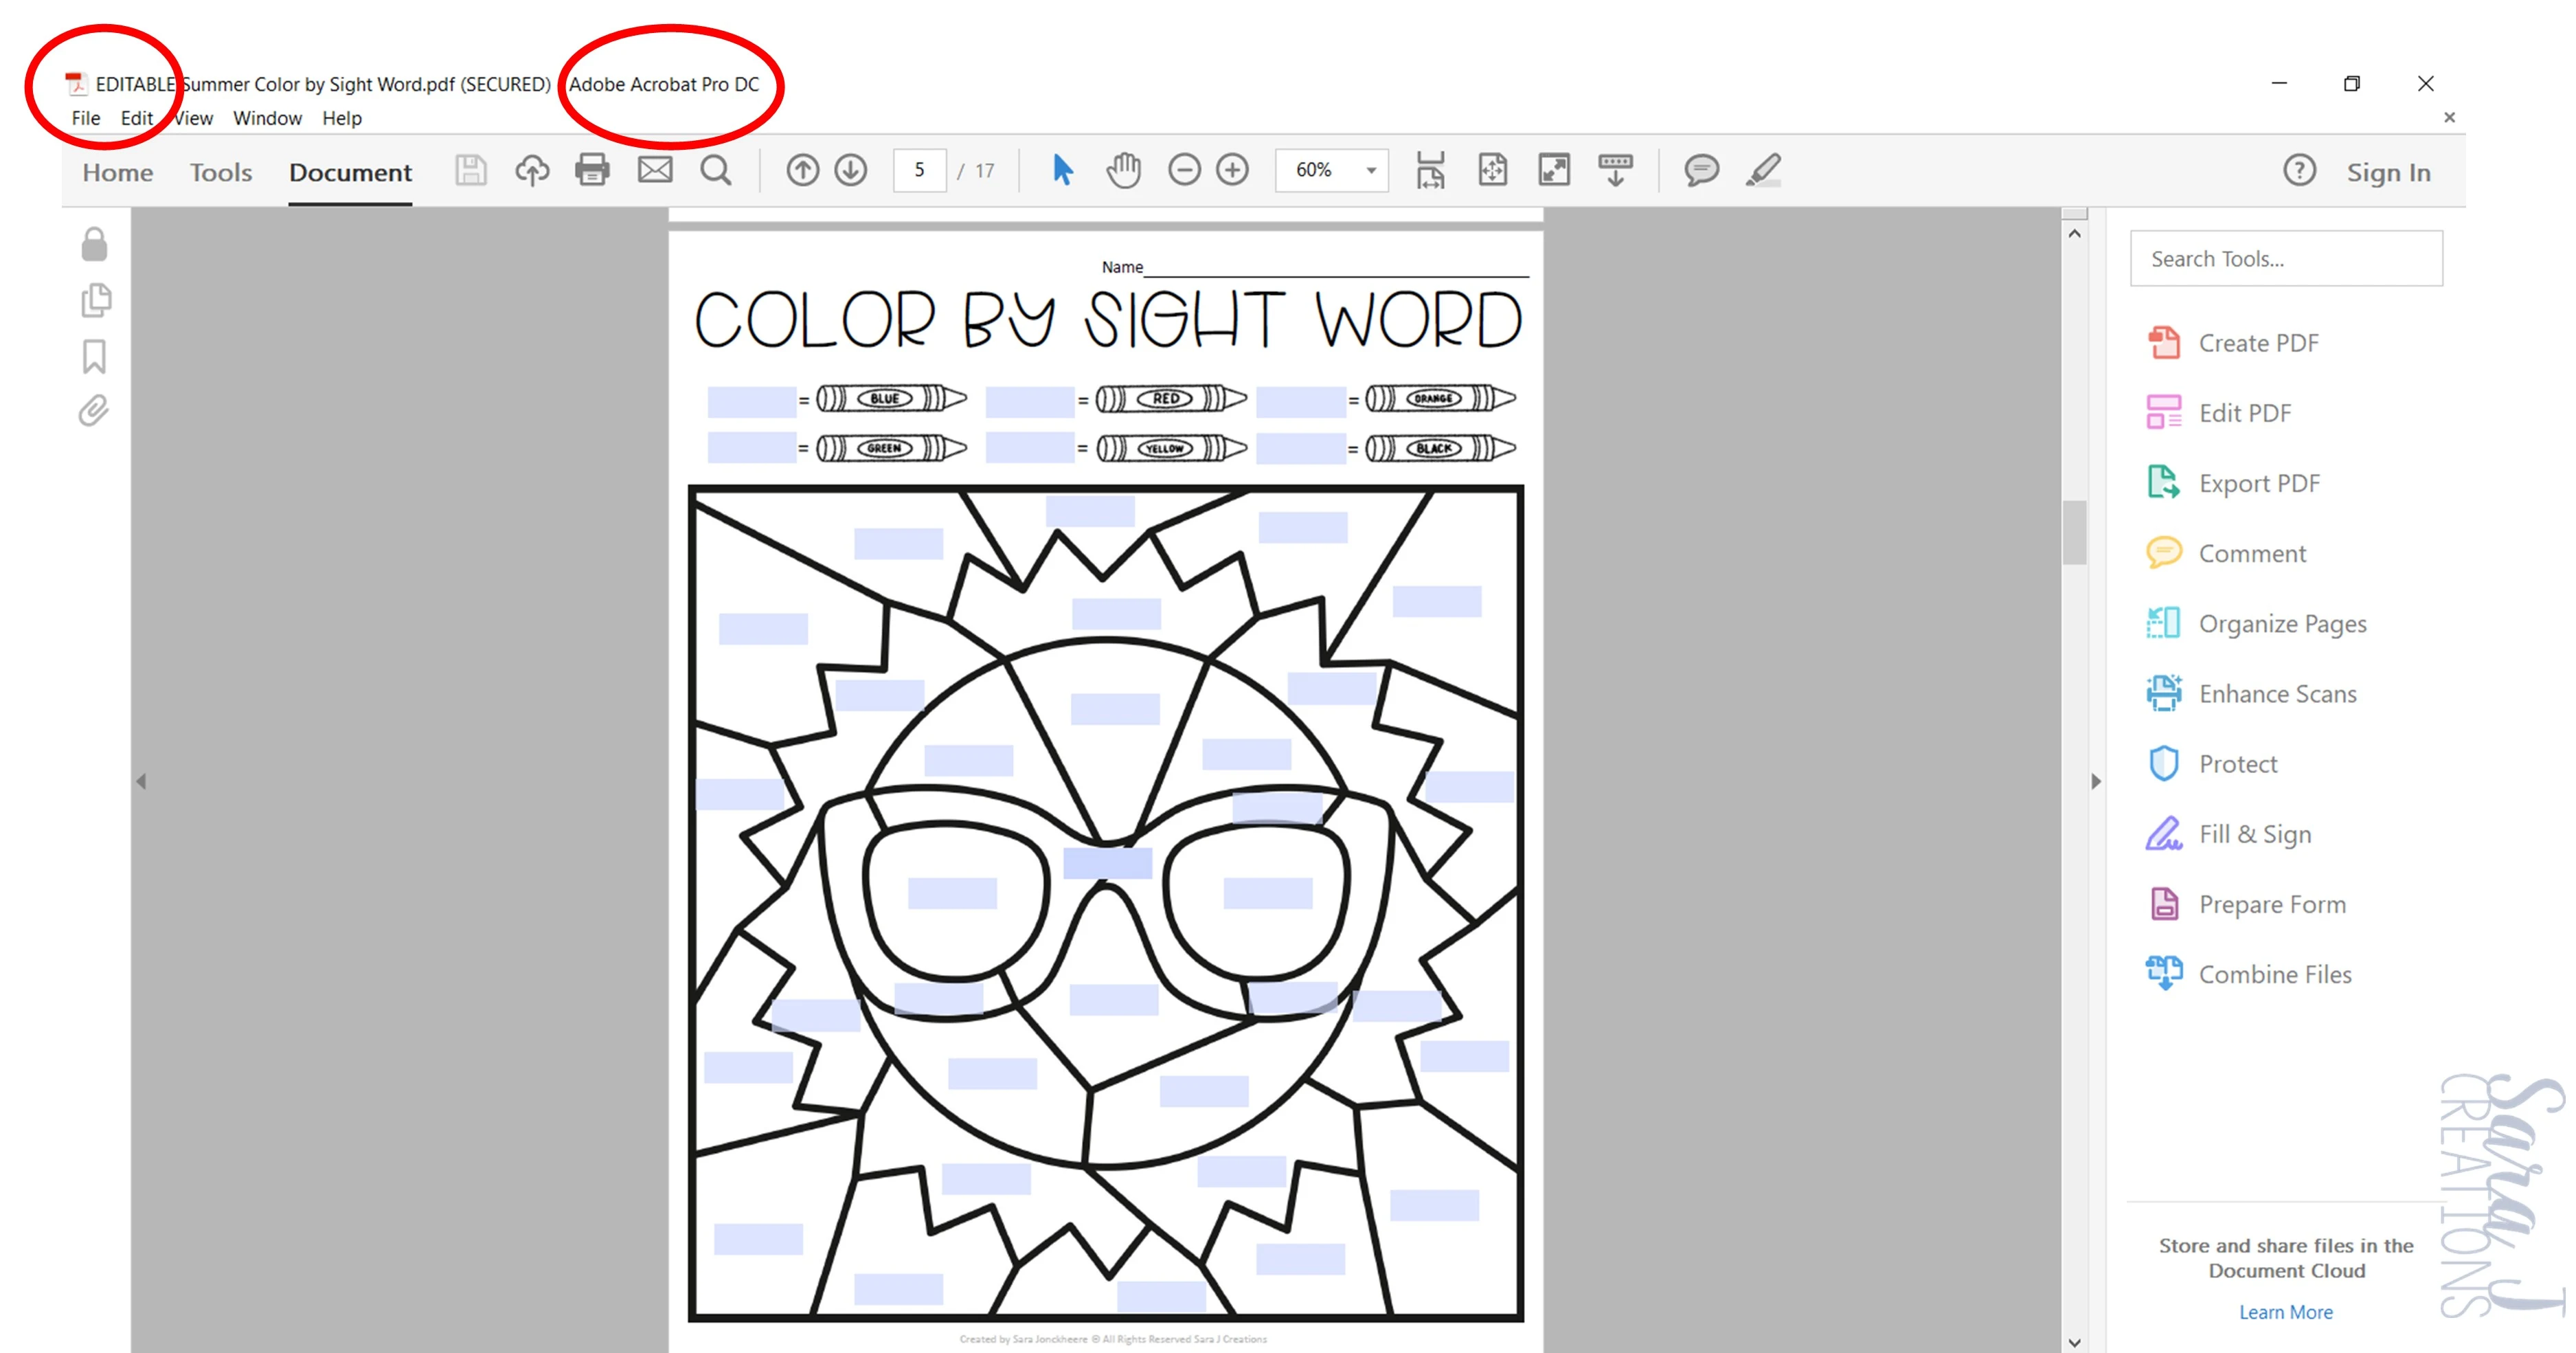
If you are using an editable pdf, make sure to open it with Adobe. Sometimes the font and size of the text will be set up for you, but you can make changes by hitting control and e at the same time. From there you can change the font or size meet your needs.
So remember you are filling in the text boxes, not editing the resource. This can also cause problems because instead of just typing in the blanks, some people try to hit “edit” in Adobe and that will often ask you for a password because it thinks you are trying to make changes to the document. All you have to do in Adobe is find the faint blue boxes designed to be typed in and start typing. No need to hit the edit button at all.
Custom Requests
Like I mentioned above, not all resources are editable. Each teaching situation is unique and each teacher has different needs. A resource might not be the perfect fit for you and it may not be editable so that you can make your changes. You can certainly reach out to a seller to ask if they can make changes, but generally most do not have the time and ability to make changes for every buyer. Some may offer to make changes to customize it for a fee. I am one of the sellers who can’t make changes and do not make all of my resources editable. I take into consideration the request and if it is something I think many people will benefit from, I add it to my list for future updates of the product.
Updated products
Did you know that when a seller updates a product you already own that you can re-download it for free to get the latest version? I try to write in emails or post on Instagram if I’ve updated a product, but that is impossible to do for every product. I think TpT even tested sending emails when products were updated, but I’ve never received one so I don’t know that they still have that feature.
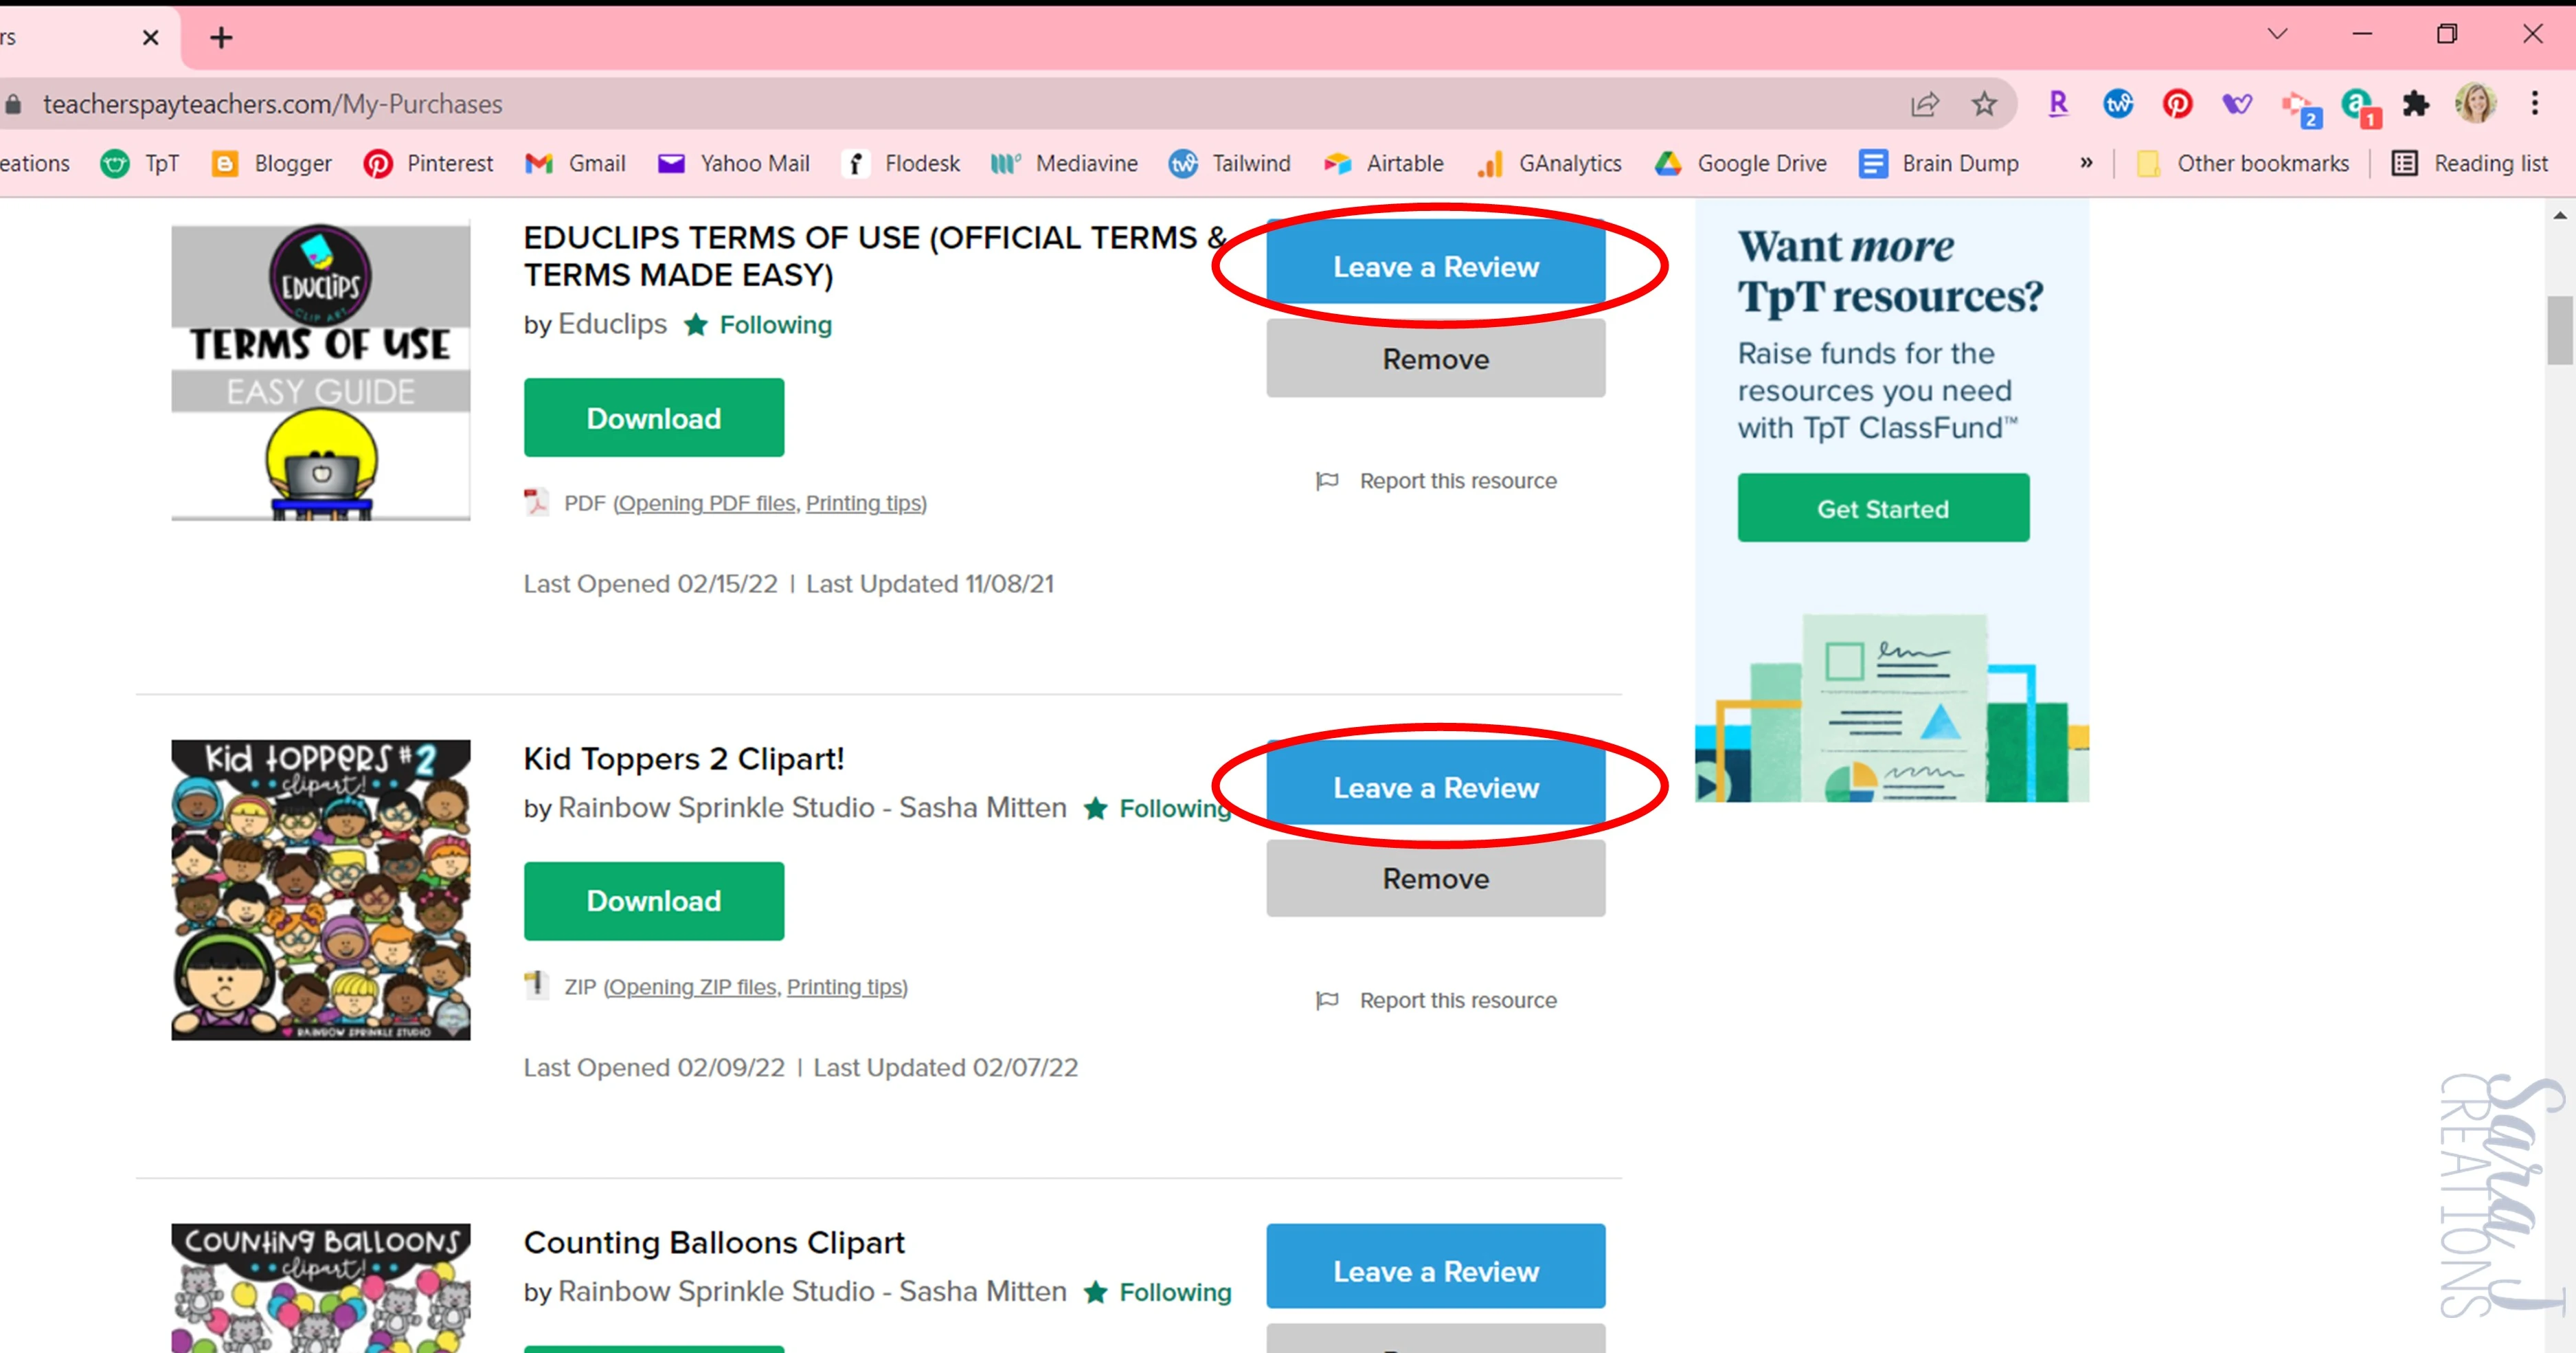
The best way is to regularly go into My Purchases on Teachers Pay Teachers. Then you can sort your purchases by Recently Updated. It will show them in order and you can often click to see a note from the seller about what was updated. Sometimes it is a major update, sometimes it is just a typo that was fixed. Either way, hit the download button to get the newest version.
Why is it Password Protected?
Most of us teacher authors that create resources for TpT do not create the clip art and fonts that we use. We purchase those to use them commercially. Those commercial licenses come with terms of use from the creators of the clipart and fonts. Generally that means we need to keep them safe in our resources by flattening the document and/or password protecting it. If you are trying to make changes to a resource it might ask you for a password and teacher authors aren’t going to share that with you. Not only are they protecting the clipart and fonts they use, but they are protecting their intellectual property and the integrity of the resource they have created.
Understanding Copyright Information
Teacher authors work hard on the content they create. It takes time to make these digital printables but we love it and we love helping teachers. We also love when our work and time is appreciated and respected. Most resources you buy should have a terms of use page in it. Read it and make sure you are using the file correctly. If you have questions, reach out to the author and ask. We don’t want to make it hard on you, we just want to make sure our intellectual property is being used correctly.
You can check out the specifics on individual resources and I address a few below, but the basics are:
- The product is for you and you alone. If you are going to share it, purchase an additional license.
- You can’t post the resource online where others can search and find it.
- You can’t make changes to the file.
I know most teachers aren’t versed in copyright regulations and it is definitely something we’ve had to learn as content creators. I used to be the teacher who would white out the copyright info on the bottom of a worksheet because I didn’t like how it looked, not realizing it was there for legal reasons.
So check the terms of use for the product you are using, if you aren’t sure, reach out to the author and ask.
License questions
This can vary from seller to seller, but most TpT sellers sell their resource with a license for one teacher and his/her classroom. That teacher can still use it each year with their new group of students. They are not supposed to email or print the file to share with their teacher bestie. A discount is offered on TPT for multiple licenses, so just purchase an extra license and then you can share the file. If you aren’t sure or your teaching situation is unique, reach out to the seller via email or the Q &A section on TpT and ask. We always appreciate the honesty when I buyer adds an extra license to their cart so they can share the resource.
Posting a Resource Online
Again, this is something that varies from seller to seller so read their terms of use, but most sellers DO NOT want their resources hosted on someone else’s website that the public can access. This means posting it on a shared school drive or website, a class website, etc. Due to the pandemic and many teachers teaching virtually, many sellers have adjusted this to allow for teachers to post it in a private online classroom that is password protected such as Google classroom, Seesaw, etc. If someone could search and find the file on your website somewhere, it is probably not allowed unless you have been granted special permission to do so.
Leaving Feedback on Products
Have you ever left a review on a product you’ve purchased on TpT? Did you know that you can earn credits for leaving feedback? To find products that need your feedback, go to My Purchases and look for the products that say Leave a Review.
Teacher authors work hard on their products and want to help teachers save time. We love reading your feedback and it helps us to know how you used it and what you thought of it. It also helps other teachers who are considering purchasing the product to read the reviews. We love it when a buyer really takes the time to leave detailed, thoughtful feedback.
Now if you had trouble opening/using the product, or found a mistake, or have a general question – don’t leave that in the review section. Use the Q & A section and ask about it or email the seller directly about it.
When you leave feedback, you earn credits on TpT. Those credits can be applied to future purchases so it is basically free money. My favorite is to save these up and apply them to purchases on sale days when you are already getting items at a discounted price.
So there you go! A few of the questions I get asked about digital resources that people have purchased on Teachers Pay Teachers. Hopefully this saves you time and a headache. Bookmark this post so you can come back to it later!


